I can't remember the last time I wrote an apartment update. A lot has changed around my house but it's been a very slow process, not only because of the money, but also because I don't focus 100% on my projects because of all the million work related things I always have to do.
Something I really wanted to do was to beautify and pretty much put together a decent coffee station. And since I recently finished it (finaaally!) I wanted to share with you guys. And I know, I've shared it in other SNS already but, not here. So, we're doing this, hehe.
Sadly I didn't take good before and after pics to share but, there is a video on my youtube channel with the whole process, I'll link it here in case you wanna check it out.
Let's go back to when I first moved into the apartment, back then I used a small bookshelf thingy as my coffee station but, it wasn't big enough to fit my coffee machines and we didn't really have space to prepare anything. It didn't look bad but, it was just not working.
So, I decided to move it to my old desk. Since I don't really have an office or specific working space yet, my desk was just working as a table to throw random things, books and other materials and, since it was in my living-dining area, it always looked super messy! Thing was, the desk was already old, it was black and had this (now) dirty and washed off sakura sticky paper. It wasn't my favorite thing to look at.
Screenshot of how my coffee station looked at the beginning. As you can see, it doesn't look nice. Plus, I didn't really like how the black base looked.
I started by painting the base of the desk white. It took me a while because it's metal and I used random white paint. It needed lots of coats to get an even color but, it was worth it.
After painting it, I bought a new sticky paper. This time I chose a wood-like one so it could match a wooden shelf I wanted to put above to display some of the many mugs I have and change them according to the season.
This is the desk/table after painting it and putting the sticky paper. I do think it changed a lot. (P.S. my walls were not painted yet!!)
After painting it and stuff, I took the longest break ever. Mostly because I needed help with the shelf I wanted to put, I didn't have the drill to do it. But, not long ago, I received one of my dad's drills and I decided to go ahead and do it! It was not my first time using a drill but, I always did it with my dad's help. Even tho my wall was a bit damaged and I had to try different plug sizes, I think it looked pretty decent.
Current state of my Coffee Station ♡
In the end, I'm really happy with how it looks. of course, I will change it in the future cuz I'd love to buy another shelf or table to use instead of the desk. But I did put a lot of love and time into it, especially because I used the experience and information I got from my dad when we used to do this things together. I think he'd be proud. ♡ I am proud.
I'll show you some close ups to talk about the things I decided to put in there.
The table and the shelf are the parts that have more decoration and things in general.
On the table, I keep my coffee machines: The black one is an Oster espresso machine my bestie gave me before moving and, the red one is a Necafé Dolce Gusto coffee maker my mom gave me years ago. It's not the newest version but, it works pretty well. I also decided to put a cup holder with some plastic mugs I don't really use. I thought they looked cute.
Next to the espresso machine I have a basket that came with a Christmas pressie I received a couple of years ago. There I keep some coffee. Below it, there's some sugar.
Between the table and the shelf, I put some decoration. From left to right, we have a wooden sign that says "coffee is my cardio", next to it is a wall sticker (that I'm sure will ruin the paint if I ever remove it) I bought right when I moved and saved it until now. They are both from Prichos. On the right, I framed a cute print I bought a couple of years ago at an anime convention. I don't really know the artist tho. Next to it, it's my Starbucks Halloween bearista that came out last year.
Close up to the print so you can see the cute deets. I loved it as soon as I saw it and knew I wanted to use it for my coffee station. I believe I bought it before moving.
Moving on to the shelf. Here I have some cute cups, reusable cups tea and decoration. I'm planning to change its decoration as the seasons change.
I wanted to display my Bleach cup cuz i love it way too much, the sakura mug is from Miniso and was a birthday pressie from the bestie. The container on the back is part of a set by Haus. It was also a bday pressie from my sister. In this one, I keep tea bags. Lastly, I keep my mug lids here too. One's mom's and the other one's mine. They are both from Ale Hop.
Moving on to the center of the shelf, I have a small, plastic tray from JOI with some British tea cans on it. These cans were a souvenir from my besties. I also keep my Sailor Moon Magic Block because she's in a mug, it's perfect! Behind her is my old, pink french press from Mumuso. And you can see more reusable cups, I have many~~~~
And, on the right I have a sakura mug from Dokkoi that was also a pressie from the bestie and a cute tea pot from the same set I mentioned earlier. Lastly, I framed a napkin I saved from a café back in Spain. Some cafés had this type of napkins with different quotes and I just loved them!
Close up to the napkin that says "Low battery, I need caffeine" hehe.
Lastly we have the lower part. There not much going here. It has two divisions where I keep napkins, another french press, a whisk, paper cups and plates and a cute cat tea set.
And next to it, there's this gong that has been in my life since forever. It was part of my parents' house decoration and I took it with me this year. I couldn't really find a good place for it but I don't want to let go of it so, I put it here for now.
I think that is it for my coffee station guys, I hope you enjoyed it as much as I did. I hope I can share more of these projects with you all. I'll remember to take some pics next time tho, hehe.
My friend Ceci and I decided to DIY an Advent calendar for each other this year and I'm super excited to start opening pressies!
I know an advent calendar is supposed to be from December 1st to the 24th / 25th but, we decided to do it from the 15th to the 31st just because... Haha.
This would be my second advent calendar ever. The first one was back in Spain and it was a chocolate calendar. It was so much fun to find a different chocolate everyday!
Chocolate Advent Calendar
We set an aproximate budget and decided it'd be filled with makeup / beauty products. We used our creativity to put it together.
To be honest, even tho I put all my heart in it, I had one of those "Expectation VS Reality" moments. It was prettier in my mind but, crafts are not my thing and, it was our first time doing it.
I wanted to have this kind of board thingy where I could put all the pressies and number them randomly. Since I (did my best) wrapped them, I ended up having different sizes and shapes. To make the board, I used recycled cardboard and Christmas wrapping paper. I added a few notes in some of the pressies. I wanted to make a separate post about what I included in Ceci's calendar but I don't want to spoil anything. what I can say is, I tried to include (mostly) useful things that she could use on a pampering day.
As for mine, it came in a box with Christmas decorated tubes and festive washi tape all around it. Each tube has this kind of graven effect thing that looks pretty cool. The idea is to poke the red lid on each tube to get the pressie. And it's randomly numbered too.
I'm really looking forward to opening these pressies. I'll be sharing them on my IG account and I could also share them all together in here if you guys want me to.
Hi guys!!
I think this could be the most random post so far but, I'm so excited about this that I felt like sharing it with you all.
Last Saturday was one of those random shopping days with my friends, those days where you just go to a few small places and buy all kinds of cute things such as pens, erasers, hair ties, etc. I didn't really bought anything but I did got a cute bag filled with cuties from my friend and shopping buddy Keisha.
And one of those cuties was a 3D puzzle! I mean, I know they are not a new thing but, I never knew we would find them so cute!
We literally spent like 20 minutes checking all the puzzles they had, we saw everything! From farms, to military themed ones and..Asian food and coffee places. At first I thought they were so cool as a Teacher, and how I could use them on my classes with the kids (which I deffo will do) but then I just knew I wanted some for myself too.
We all ended up having one. Kei got an Asian coffee place and Eonni got the same as mine. I think those were the highlight of our shopping! We felt like little girls in a toy store.
Ok, enough of my story, let's check the puzzle!
♥ Brand: AISHANGPIN and it's Chinese.
♥ It comes with 4 cardboard sheets with 65 pieces. The pieces include, tables, mini food and costumers!(Can you feel my excitement while reading this? LOL)
♥ The pieces are really detailed! Especially the food, I can't get over how cute they are.
So...it took me a while to put the whole thing together but, I had a lot of fun doing it! It was a little relaxing in a way.
I just don't know where to put it now...I have no place for it! (T3T)
Anyway, I think this would be a fun activity to do with kids (if you have kids~) or if you're like us, people who enjoy this type of cute things. Fun and pretty to look at!
I hope you enjoyed this short and random post. Stay tuned for more 3D puzzles in the future!! I'm sure there will be more!
RANDOM FACT: I'm not good with puzzles! Maybe that's why it took me awhile to figure how to build this little restaurant. Gotta do more brain exercise!
Hello babies!
Christmas is almost here and Monnie Claus is busy with our holiday decorations. This year I decided to get a little crafty and make a wreath for our house.
The end result wasn't exactly the one I wanted but I still think it looks cute.
I bought everything at a dollar store. Even the green wreath, so to be honest, it was a pretty cheap one.
I found all these glittery stuff I totally fell in love with.
All I used was a hot glue gun to paste all the thingies on my wreath and...voila!
These big bells are my favorite!
I had so much fun making it and it looks super cute hanging on our front door.
This year I decided I wanted to work on some DIYs and include them to my Halloween decoration. Something super easy and cheap to do are these bat wall frames. They look really cute and it doesn't take much time to create them.
What you need:
- Black paper sheets (or any color you want)
- Newspaper
- Scissors
- A lighter
- Frames. (You can easily find some at the dollar store, lots of shapes and sizes)
Here we go!
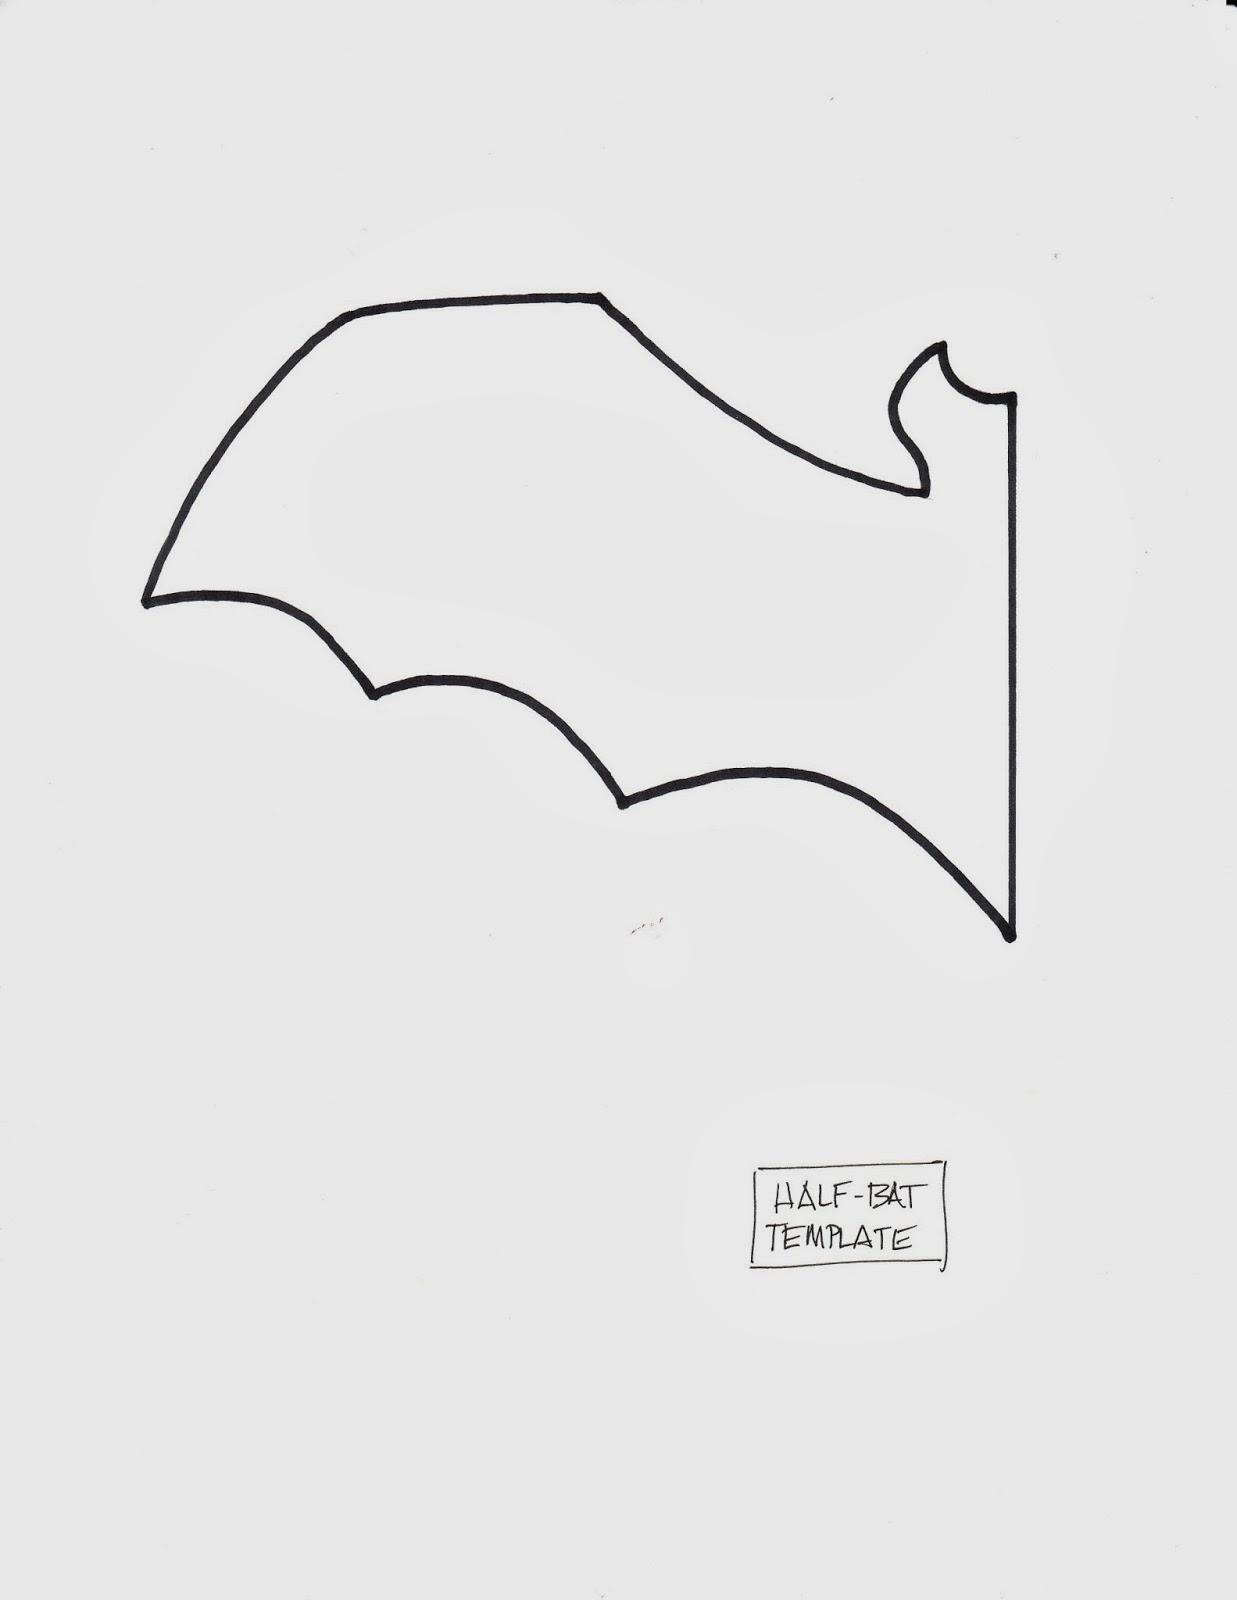
Draw bats on your black sheets, you can play with the size you want them to be. Then cut them.
Cut the newspaper so it fits your frames and use the lighter to burn it as you like. It can be the corners or the whole contour of it.
Place the bats on the burned newspaper and put them on the frames.
And that's basically it! You can make as many as you want changing sizes and colors to decorate your Halloween wall.
Hope you guys like this easy decoration idea.
Have a happy Witchy Wednesday!!
x


.jpg)

.jpg)